Duraledge Hd & Lt Sink Lift Kit For Undermount Kitchen Sink Installation
Installing Farmhouse Sink In Existing Cabinets With Sink Mount Brackets
Farmhouse Sink Installation is a breeze with our DuraLedge’s sink mount brackets. By following our detailed directions below, you’ll discover how quickly mounting your sink can be accomplished
Tools Needed for DuraLedge HD:
- Sink Manufacture’s Specifications
- Safety Glasses
- Power Drill
- 5/16″ Wood Drill Bit
- #2 Phillips Bit
- 7/16″ Socket or Adjustable Wrench
- 1/4″ Socket or Flat Head Screwdriver (adjust leg leveler)
- Masking Tape For Marking (optional)
- Tape Measure
- Level
- Pencil
Tools Needed for DuraLedge LT:
- Sink Manufacture’s Specifications
- Safety Glasses
- Power Drill
- 1/4″ Wood Drill Bit
- #2 Phillips Bit
- 3/8″ Deep Well Socket or Wrench
- 1/4″ Socket or Flat Head Screwdriver (adjust leg leveler)
- Masking Tape For Marking (optional)
- Tape Measure
- Level
- Pencil

How To Install Stainless Steel Farmhouse Sink
Read These Tips
Doing so will ensure a great product. Manufacturer will not be held responsible for damage to any product or other products due to incorrect installation, installation, or negligence.
Doing so will ensure a great product. Manufacturer will not be held responsible for damage to any product or other products due to incorrect installation, installation, or negligence.
- Add 3/8″ hex nut to post prior installation and tighten the hex nut against the weld nut after the sink is set. Hex nut goes above the weld nut.
- Finished sink weight not to exceed 400 lbs.
- Weld nuts for adjustable posts must be positioned to the top side of the bracket for proper installation.
- If the sink cabinet has cabinets to be attached to either side, fasten cabinets together prior start of installation.
- Any obstructions in flanking cabinets or appliances must be removed prior drilling.
- Such as shelving, pull outs, trash pullouts/bins, dishwashers, etc.
- Cabinetry with less than 1/2″ side walls may need reinforcement.
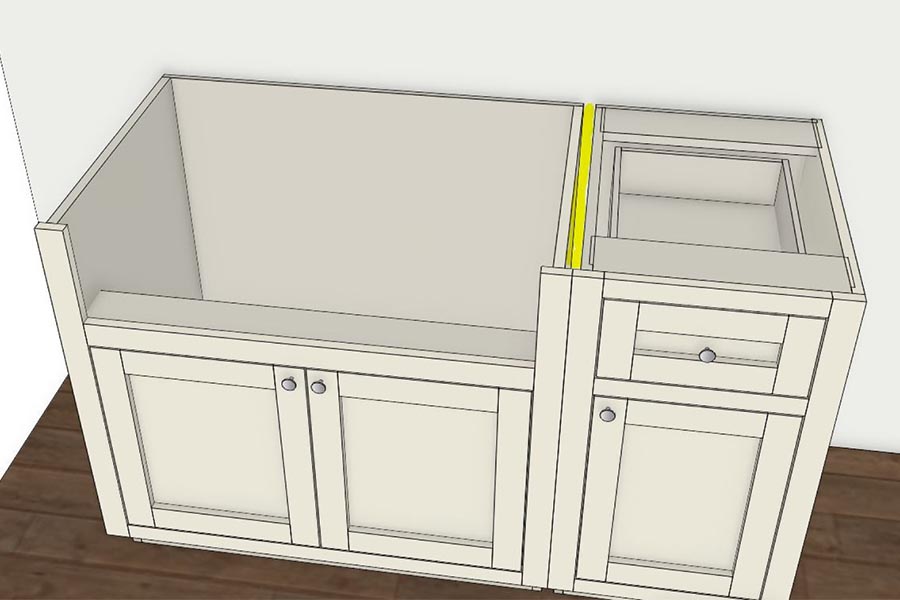
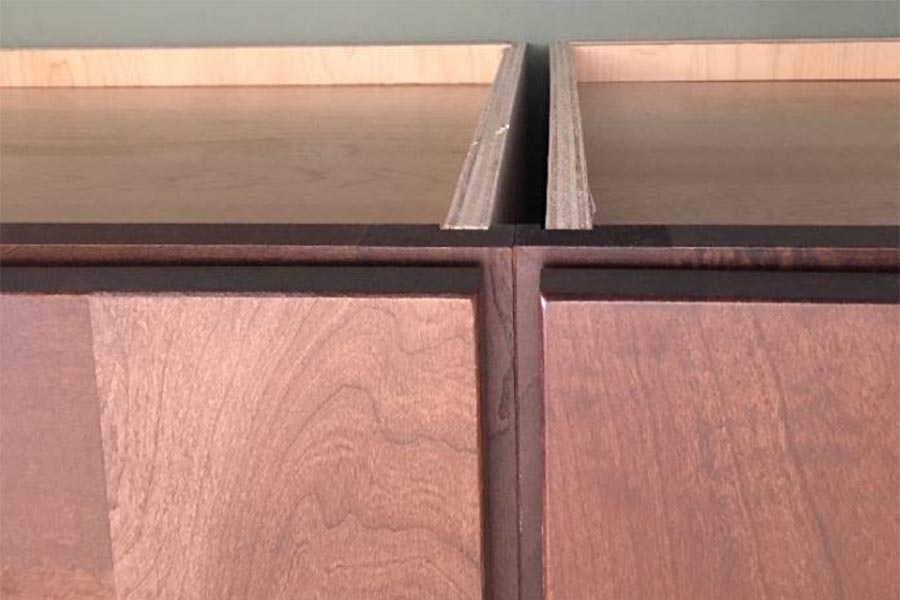
- Any Voids between cabinets must be filled prior installation of bracket bolts going through both walls. Illustration below shows typical voids.
- Brackets must be mounted vertically straight.
- Install leg levelers after brackets have been installed and secured.
- Brackets recommended to be installed a minimum of 3” away from drain(s).
- Split lock washer and hex nut installed against bracket, inside cabinet.
Read These Tips
Doing so will ensure a great product. Manufacturer will not be held responsible for damage to any product or other products due to incorrect installation, installation, or negligence.
- Add 3/8″ hex nut to post prior installation and tighten the hex nut against the weld nut after the sink is set. Hex nut goes above the weld nut.
- Finished sink weight not to exceed 165 lbs.
- Weld nuts for adjustable posts must be positioned to the top side of the bracket for proper installation.
- If the sink cabinet has cabinets to be attached to either side, fasten cabinets together prior start of installation.
- Any obstructions in flanking cabinets or appliances must be removed prior drilling.
- Such as shelving, pull outs, trash pullouts/bins, dishwashers, etc.
- Cabinetry with less than 1/2” side walls may need reinforcement.
- Any Voids between cabinets must be filled prior installation of bracket bolts going through both walls. Illustration below shows typical voids.
- Brackets must be mounted vertically straight.
- Install leg levelers after brackets have been installed and secured.
- Brackets recommended to be installed a minimum of 3” away from drain(s).
- Split lock washer and hex nut installed against bracket, inside cabinet.
How To Manually Install a Farmhouse Sink (NON-CNC)
- Referencing sink manufactures specifications, note the sink height and depth needed for your specific application.
- Height needed for sink, plus (+) 3” is 3rd hole down from the top of the bracket. Bracket weld nut for adjustable post faces up.
- Fasten brackets using the ⅝” Pan head screw into the 3rd hole down from the top of the bracket.
- Level bracket vertically.
- Mark holes 1, 2, & 4.
- If needed remove bracket and drill holes 1, 2, & 4 with 1/4” drill bit.
- Reinstall bracket using 5/8” Pan Head Screws.
- Finish installing brackets using hardware provided.
- Install leg leveler with 3/8″ hex nut above the weld nut, insert sink and adjust for fit as needed.
- Once the sink is in its final position, move 3/8″ hex nut down to sit snug against the weld nut.


