
Undermount Sink Bracket HD Kit for Farmhouse Sinks 166-400 LBS
$169.99
Discover the ultimate solution for installing farmhouse, apron, and other undermount sinks with DuraLedge’s Heavy-Duty in sink mounting system Bracket Kit. Engineered for ease-of-use and durability, our bracket kit is specifically designed for heavyweight sinks, including solid surface, clay fired, cast iron sink undermount supporting, or any sink that weighs between 166 and up to 400 lbs.
Easy and Durable Installation
You no longer need to rely on makeshift installations that use cheap looking 2 x 4’s that don’t always fit properly and can fail to support your sink. The DuraLedge Undermount Sink Bracket Kit helps ensure a trouble-free, swift installation process. With these sink support brackets, you can securely mount your farmhouse sink to your cabinets, providing a durable support system that lasts.
Easily Adjustable for Perfect Alignment
Sink designs vary, with some sloping to one side for more efficient water drainage. DuraLedge undermount sink brackets can easily be adjusted independently, enabling you to customize the alignment of your farmhouse sink. This customization allows for the perfect fit in your space and allows proper water flow on a consistent basis.
Maximize Space Underneath
Are you tired of struggling with limited space to install plumbing fixtures? DuraLedge’s innovative bracket design opens up valuable space beneath your sink. With the farmhouse sink securely mounted to the sides of your cabinet, you will have plenty of room available for plumbing and other key fixtures.
Sagging Sink?
The DuraLedge HD bracket also makes a great undermount sink repair kit for all standard sinks that may need maintenance or have sagged over time.
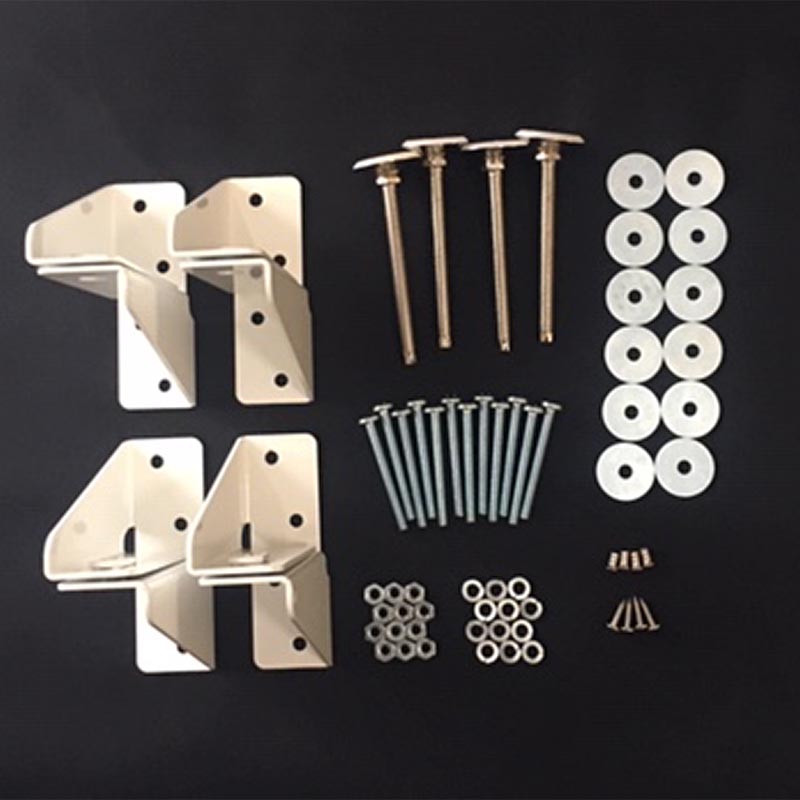
What’s Included
Our Undermount Sink Bracket HD Kit includes everything you need for a seamless and durable installation:
- 4 Brackets
- 4 Leg Levelers (4″)
- 12 Machine Screws (2½”x ¼”)
- 12 Washers (1¼” x ¼”)
- 12 Hex Nuts (¼”)
- 12 Split Lockwashers (¼”)
- 4 Pan Head Screws (⅝”)
- 4 Euro Screws (6.3mm x 10mm)
- 4 Hex Nuts (⅜”)
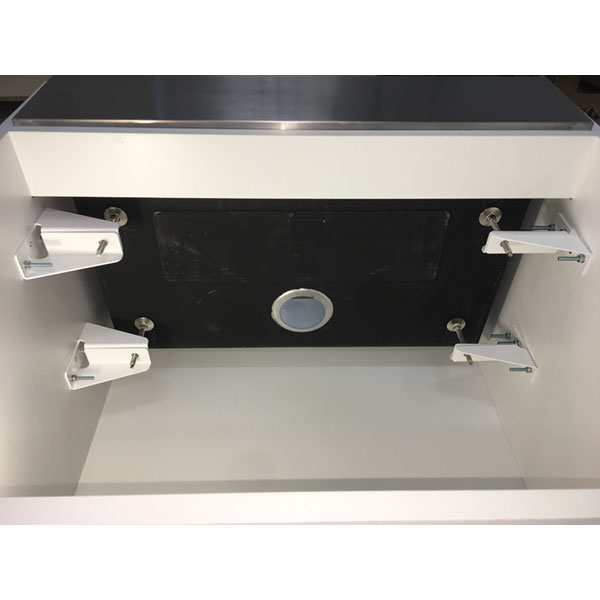
Installing the Undermount Sink Support Brackets
Refer to the installation instructions we have provided below for detailed guidance on achieving the perfect installation
Get Superior Sink Support with DuraLedge Brackets
Order your DuraLedge Undermount Sink Bracket Kits online right now. To learn more about the benefits of our patented brackets for undermount sink applications, call us today at 715.690.4281 or send us a message through our contact form.
Download the instructions here.
Sink Lift sink mount brackets are easy to install. By following our detailed directions below, you’ll discover how quickly mounting your sink can be accomplished.
Tools Needed:
- Sink Manufacture’s Specifications
- Safety Glasses
- Power Drill
- 5/16″ Wood Drill Bit
- #2 Phillips Bit
- 7/16″ Socket or Adjustable Wrench
- 1/4″ Socket or Flat Head Screwdriver (adjust leg leveler)
- Masking Tape For Marking (optional)
- Tape Measure
- Level
- Pencil
Read These Tips
Doing so will ensure a great product. Manufacturer will not be held responsible for damage to any product or other products due to incorrect installation, installation, or negligence.
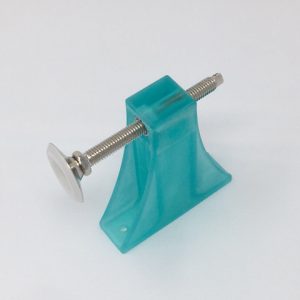
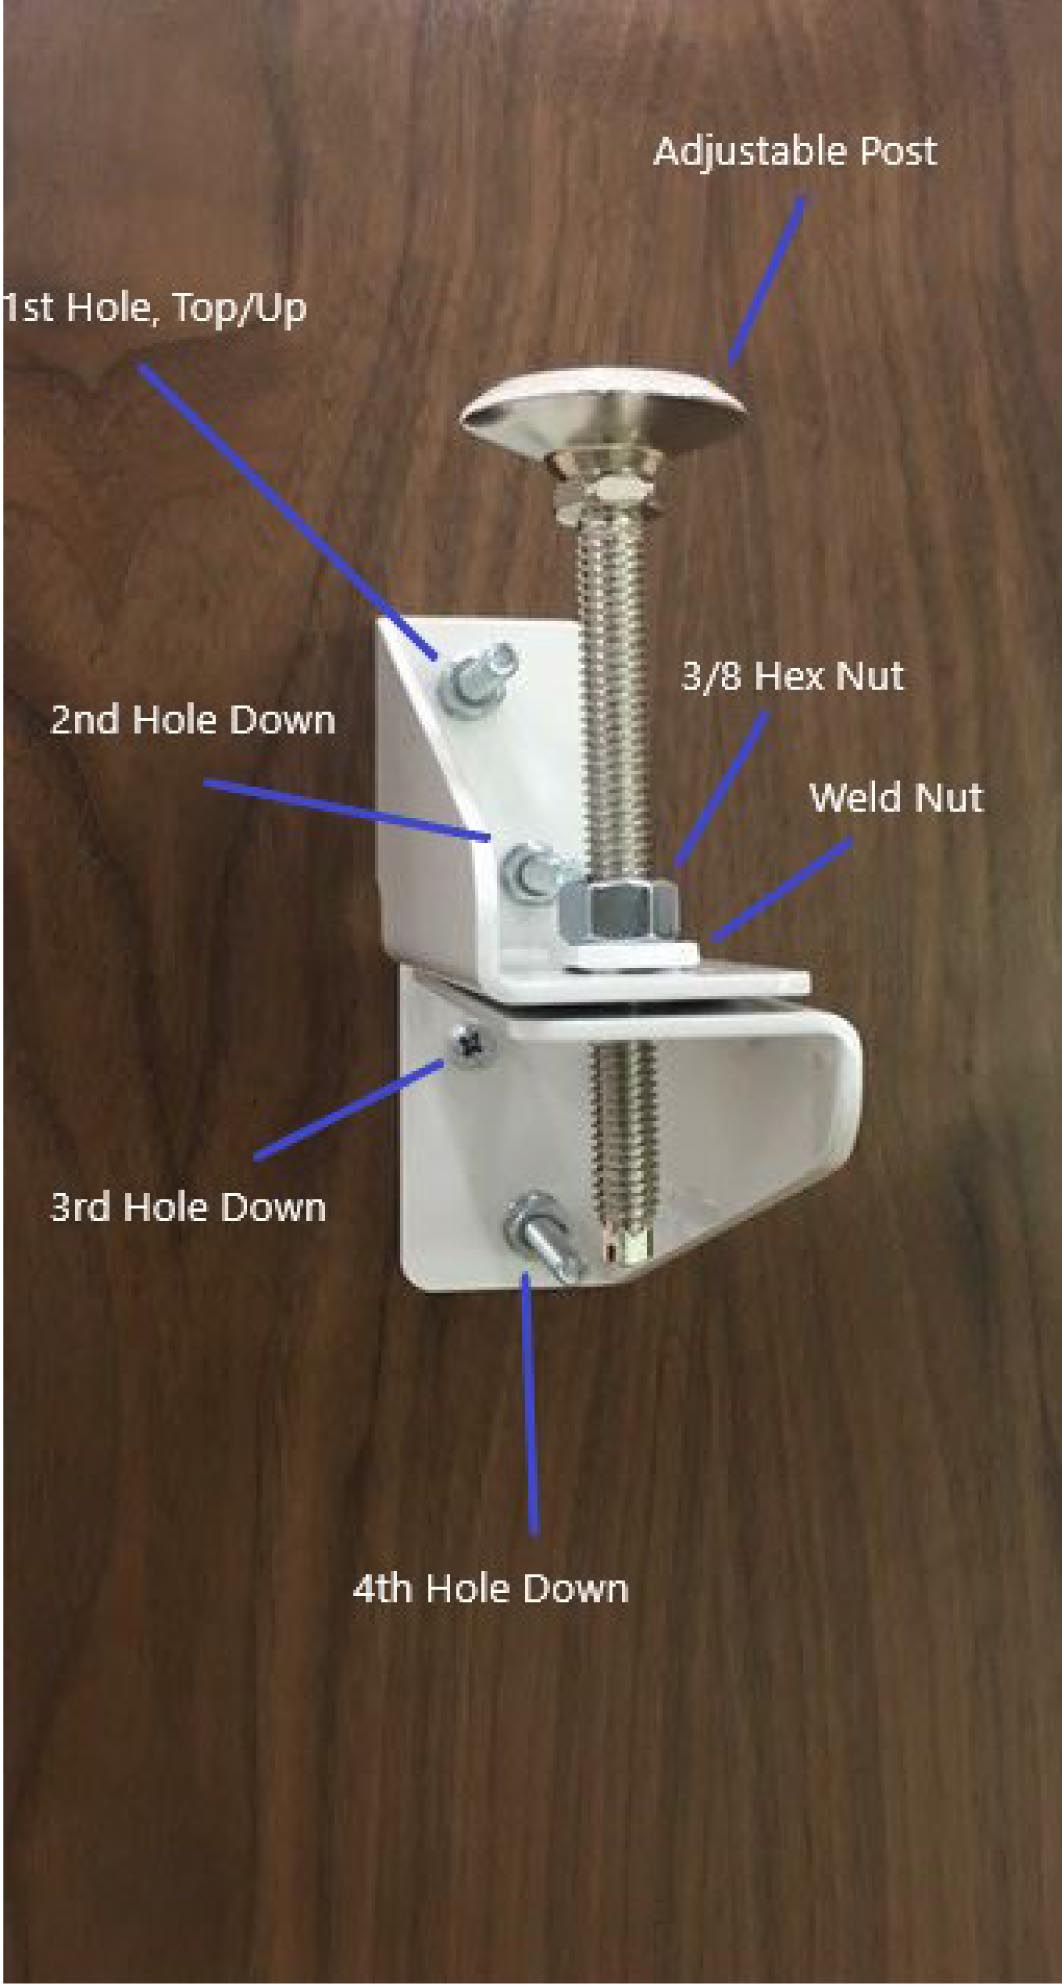
- Add 3/8″ hex nut to post prior installation and tighten the hex nut against the weld nut after the sink is set. Hex nut goes above the weld nut.
- Finished sink weight not to exceed 400 lbs.
- Weld nuts for adjustable posts must be positioned to the top side of the bracket for proper installation.
- If the sink cabinet has cabinets to be attached to either side, fasten cabinets together prior start of installation.
- Any obstructions in flanking cabinets or appliances must be removed prior drilling. Such as shelving, pull outs, trash pullouts/bins, dishwashers, etc.
- Cabinetry with less than 1/2″ side walls may need reinforcement.
- Any Voids between cabinets must be filled prior installation of bracket bolts going through both walls. Illustration below shows typical voids.
- Brackets must be mounted vertically straight.
- Install leg levelers after brackets have been installed and secured.
- Brackets recommended to be installed a minimum of 3” away from drain(s).
- Split lock washer and hex nut installed against bracket, inside cabinet.
Manual Installation (non-cnc)
- Referencing sink manufactures specifications, note the sink height and depth needed for your specific application.
- Height needed for sink, plus (+) 3” is 3rd hole down from the top of the bracket. Bracket weld nut for adjustable post faces up.
- Fasten brackets using the ⅝” Pan head screw into the 3rd hole down from the top of the bracket.
- Level bracket vertically.
- Mark holes 1, 2, & 4.
- If needed remove bracket and drill holes 1, 2, & 4 with 1/4” drill bit.
- Reinstall bracket using 5/8” Pan Head Screws.
- Finish installing brackets using hardware provided.
- Install leg leveler with 3/8″ hex nut above the weld nut, insert sink and adjust for fit as needed.
- Once the sink is in its final position, move 3/8″ hex nut down to sit snug against the weld nut.